At last, I have completed pretty much all the main accessories for my Rosalina cosplay. The wand is done, and so are the earrings, plus the Luma plushie. And not long ago, I just finished the crown. Now that project was a bit of a mess. The crown itself wasn’t so bad. The first thing I did was cut out some foam. I then noticed that Rosalina’s crown had a four-pointed star shape on each of the points of the crown. I planned on painting this black, but first, I wanted some texture. So I drew the shapes onto the foam with pencil, then I used the end of a pen to create a deep indent. (I used a pen because I had nothing thin enough that wouldn’t simply slice right through the foam. I thought an actual knife would be a bad idea, you know.)
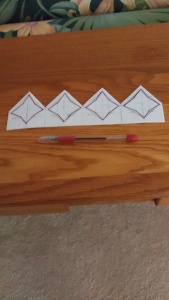
My next step was molding the crown into the correct shape using the same method as Ghirahim’s bracelet from last year. Problem was, I realized I had missed an important step last time. In order for the foam to hold its shape, you first needed to soften it with an iron. I remembered that step just fine. What I completely skipped was painting the entire thing with glue in order for it to better stay in the shape you had bended it into. I did not forget that part this time, and I found that the glue gave the foam a really interesting texture and, just as the video stated, a nice shine. After sticking the ends together with some handy super glue, my crown was already looking quite regal.
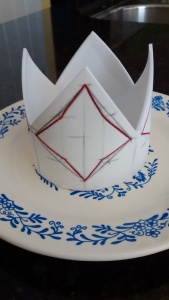
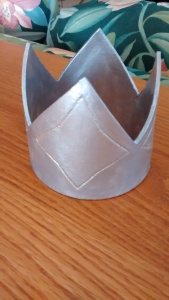
Next, I painted the crown silver, and the texture from the glue really made it look like real metal. I then decided against painting the indents black, as they actually looked quite nice as they were. Plus, they looked so clean, I worried my clumsy hands would paint jagged lines, and that just wouldn’t look nice, now would it?
Now this is where things got hard. The last thing I needed to do was to make the gems that would go on her crown, two blue and two red. These needed to be round, and my previous method of using tag board to make molds would simply not work. While I could no longer find the video where I had originally learned this skill, I was pretty sure they said that clay could be used to make round molds. I may have heard wrong.
Well, I bought some soft clay at the craft store, but I immediately was met with a vital question. Do I, or do I not, bake it? I chose to bake it. You see, I worried the moist clay would cause problems with the resin, so I used the knob on the top of a new teapot to make the round mold, and I baked that thing. I mixed up some blue resin for my first two gems. Three days later, the resin would not come out. I tried freezing it for ten minutes like some people on the Internet said. Didn’t work. It was only after beating the clay with rocks that I got the resin free.
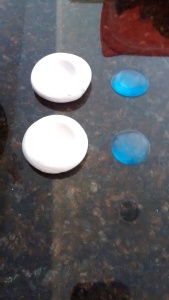
Despite only barely getting my gems free from the clay, I decided to try my same method, as it did work, and the clay was undamaged from the rampage I exacted upon it. I heard, however, that it was good to grease the mold with oil first so that the resin would come out easier. I did, and I mixed some red resin. When I poured it, it started overflowing in the mold, with a rather greasy rim. I poured it out, wiped out the oil, and tried again. All seemed well. I waited three days. And the resin would not come out. I tried beating it with rocks. This. Did not work. In fact, it almost seemed the leftover oil had fused the resin to the clay more than anything. I beat on that clay with rocks and hammered sharp metal pieces into it, and I succeeded only in destroying the mold and ending up with gems with hardened clay stuck to them.
This was clearly not going to work, so I tried again. This time, I made new molds out of clay and did not bake them. I also did not grease them. Three days after pouring some new, red resin, I managed to pull the mold off, but lots of soft clay stuck to the gems, and I had to use my fingernails to carefully pick all the clay off. I eventually got my gems free, but it was a tedious process. In the meantime, I had looked up better ways of making molds on Amazon, and I believe that will be the next method to try eventually. But, for now, my gems for the crown were done. I super glued some small circles of aluminum foil to their backs for extra shine, hot glued them to the crown, and there you go.
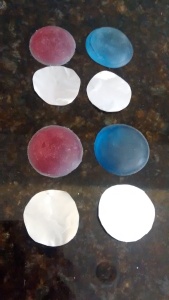
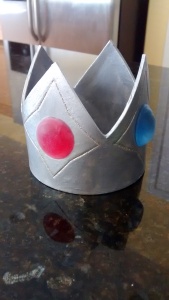
Now, I am not completely done with the crown, as I do need to find a way to attach a hairband so that the crown will more easily stay on my head. But, that’s a matter for another day. As of writing this, I am awaiting a sewing pattern in the mail that people have used to make Rosalina’s dress. Simplicity 9891, I believe. I hope it works.
You May Now Call Me, Your…Um…Duckesty. Your Duckness?

I’m always impressed by the amount effort required for cosplay, especially stuff that looks like it’s relatively simple. Great work Duck! looking forward to seeing the finished product!
LikeLike
Thanks! It is indeed surprising how much work this stuff takes. I thought the crown would be easy, and it mostly was, except for those darn jewels. Resin is awful.
LikeLike